IntelliJのpluginをScalaでつくる
Posted on March 03, 2019 at 20:15 (JST)
IntelliJ用のカスタムプラグインを作成してみたので、メモを残す。
ScalaMock用のプラグインを作成、せっかくなのでScalaで書いてみた。
ビルドにはGradleを使用した。
今回作成したコードはこちら
動作環境
OS: macOS Mojave ver. 10.14.1
Scala: 2.12.7
作成したプラグイン
scalamock-template-intelliJ-plugin
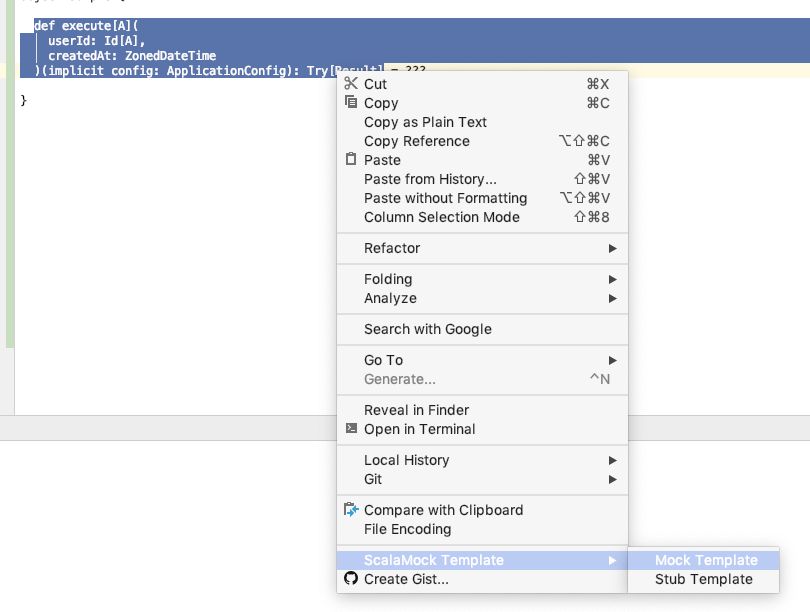
- エディタ上でメソッドのシグネチャを選択して右クリックして、メニューから機能を呼び出す
- 選択部分を文字列解析してメソッド名や引数などを取得し、あらかじめ用意していたテンプレートに埋め込み整形する
- 結果をクリップボードにCopyする
クリップボードに保存された内容
(mock.execute[A](userId: Id[A], createdAt: ZonedDateTime)(implicit config: ApplicationConfig))
  .expects(*, *, *)
  .once()
  .returns(Try[Result])
※ テスト用に書いたメソッドなのでツッコミはご遠慮ください :-P
プロジェクト作成
公式のGetting StartedやKotlinで書くIntelliJ Pluginを参考にIDEAからプラグイン用のプロジェクトを生成。
その後、GradleでScalaを使うためのセッティングを追加した。
GradleでScalaを動かす設定
[build.gradle(抜粋)]
buildscript {
    ext {
        scalaVersion = "2.12.7"
    }
    repositories {
        mavenCentral()
    }
}

apply plugin: 'scala'

dependencies {
    compile "org.scala-lang:scala-library:${scalaVersion}"
}
機能の実装
1. AnActionクラスを継承したクラスを作成する
com.intellij.openapi.actionSystem.AnActionを継承し、必要なメソッドをオーバーライドして機能を拡張する。#actionPerformedには実際に行う処理(今回は選択した文字列を取り出して整形し、クリップボードにコピー)を記述する。#updateはメニューの活性/非活性を制御するための処理を記述。下記のコードではエディタで文字列を選択している場合に活性となる。
trait TemplateGenerator extends AnAction {

  def generateTemplate(text: String): String

  override def actionPerformed(e: AnActionEvent): Unit = {
    val editor         = e.getRequiredData(CommonDataKeys.EDITOR)
    val selectionModel = editor.getSelectionModel
    Option(selectionModel.getSelectedText) match {
      case Some(text) if !text.isEmpty =>
        val template = generateTemplate(text)
        CopyPasteManager.getInstance().setContents(new StringSelection(template))
      case _ => ()
    }
  }

  override def update(e: AnActionEvent): Unit = {
    val project = e.getProject
    val editor  = e.getData(CommonDataKeys.EDITOR)

    e.getPresentation.setVisible(
      project != null
      && editor != null
      && editor.getSelectionModel.hasSelection
    )
  }
}
2. 設定ファイルにてIntelliJのどの操作にマッピングするかを記述する。
画面操作(トリガー)と機能のマッピングは actions 要素に記載する
[src/main/resources/META-INF/plugin.xml(抜粋)]
<idea-plugin>
    <depends>com.intellij.modules.lang</depends>

    <actions>
        <group id="ScalaMockTemplate.Group.Main" text="ScalaMock Template"
               description="Group of ScalaMockTemplate"
               popup="true">
            <add-to-group group-id="EditMenu" anchor="last"/>

            <!-- 実装したクラスとのマッピング -->
            <action id="ScalaMockTemplate.Mock" class="MockTemplateAction" text="Mock Template"
                    description="Illustrates how to plug an action in" />
            <action id="ScalaMockTemplate.Stub" class="StubTemplateAction" text="Stub Template"
                    description="Illustrates how to plug an action in" />
        </group>

        <group id="MyPlugin.ScalaMock" text="ScalaMock template"
               description="ScalaMock menu"
               popup="false">
            <!-- エディタ上で右クリックした時に現れるメニューの最後に追加 -->
            <add-to-group group-id="EditorPopupMenu" anchor="last"/>

            <separator/>
            <!-- メニューに階層構造を持たせる -->
            <reference ref="ScalaMockTemplate.Group.Main"/>
        </group>
    </actions>
</idea-plugin>
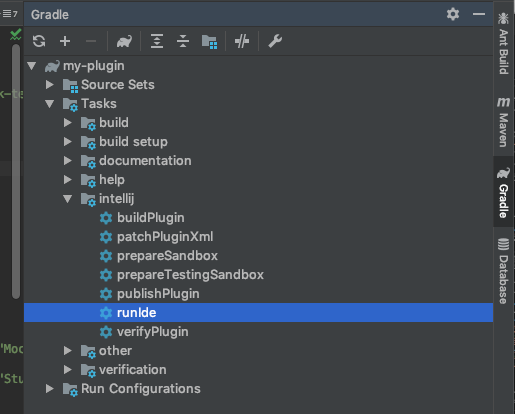
3. 動作確認
Gradleタスクの runIde をクリックするとプラグインを適用した状態のIntelliJが立ち上がるので、実際に操作を行い動作確認ができる。
単体テストについて
必要なライブラリ追加は build.gradle に記述する。
dependencies {
    testCompile group: 'org.scalatest', name: 'scalatest_2.12', version: '3.0.6'
    testCompile group: 'org.scalamock', name: 'scalamock_2.12', version: '4.1.0'
}
テストクラスに @RunWith でテストランナーを指定しないとテストクラスとして認識されないので注意。
@RunWith(classOf[JUnitRunner])
class MethodSignatureSpec extends FreeSpec {
下記コマンドでテストを実行する。
-i オプションはテスト結果詳細(アサーション失敗時の差分やプリントデバッグの内容など)を表示する。
$ ./gradlew test -i
ビルドについて
下記コマンドを実行すると build/distributions ディレクトリの下にzipファイルが出来る。
$ ./gradlew buildPlugin
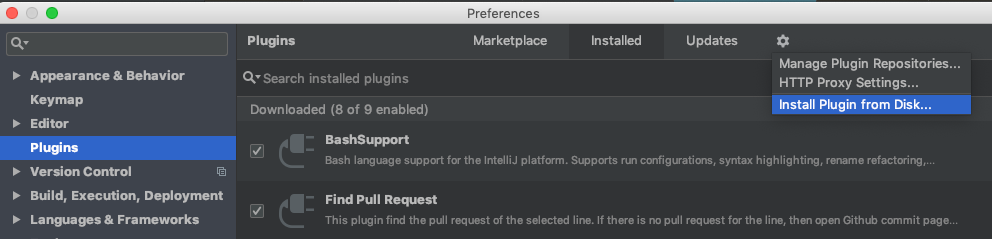
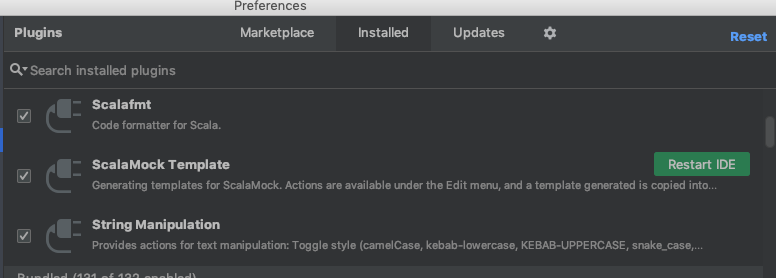
Macなら IntelliJ IDEA => Preferences の Plugins にある歯車アイコンをクリックし、Install Plugin from Disc から作成したプラグインを選択し、再起動すれば使えるようになる。
※ JetBrainsアカウントを持っていれば IntelliJ Plugin Repository に作成したプラグインを登録し配布することができる。(審査あり)
Publishing a plugin
以上。